Tutorial - Possum Pelt Processing.

Moderators: William Anderson, letumgo

Mataura mayfly
Posts: 3648
Joined: Thu Oct 27, 2011 6:28 am
Location: Southland, South Island, New Zealand.

Re: Possum Pelt Processing.

Post by Mataura mayfly » Sun Feb 16, 2014 2:06 pm

Yes- often.
When I used to do it all the time and had a fair amount of my annual income thanks to furry critters I had tricouni's nailed on the instep of my boot soles to really get a hold of the slippery bits. Rubber gumboots (muck boots?) are a beggar for "letting go", so I prefer hard soled boots.

Tricouni.

Image
"Listen to the sound of the river and you will get a trout".... Irish proverb.
User avatar
Premerger
Posts: 546
Joined: Thu Jul 11, 2013 4:39 pm
Location: Wellington, New Zealand

Re: Possum Pelt Processing.

Post by Premerger » Sun Feb 16, 2014 4:08 pm

A great post Jeff and chance for us to see an expert skinner at work.
On tails, does a brown possum have a brown or black tail?
Was wondering how to get a brown/dark brown tail.
The two I have are black and they're fantastic for buggy flies :)
How hard can it be?
Mataura mayfly
Posts: 3648
Joined: Thu Oct 27, 2011 6:28 am
Location: Southland, South Island, New Zealand.

Re: Possum Pelt Processing.

Post by Mataura mayfly » Sun Feb 16, 2014 4:34 pm

Hardly in the "expert" category Tim- just well practised. ;) Tails on the brown possum are still pretty much black, there are lighter and darker shades in the tails, but usually shades of black.
I have shot one once that had say the last two inches of its tail a very buff cream colour, not unlike the belly of the silver/greys, but that is one among many thousands I have dealt with over the years.

Ask your better half about hair dyes and such, you should be able to bleach/dye a possum tail pretty much any colour that will work with human hair? Just make sure it is the permanent kind and not the colour designed to wash out after so many washes, non-permanent dyes and fly tying materials are not a great combination!
"Listen to the sound of the river and you will get a trout".... Irish proverb.
Mataura mayfly
Posts: 3648
Joined: Thu Oct 27, 2011 6:28 am
Location: Southland, South Island, New Zealand.

Re: Possum Pelt Processing.

Post by Mataura mayfly » Mon Mar 10, 2014 2:35 am

Right, better get back to this!
Between work commitments, another overseas guest (Yorkshire man ;) ) and crappy weather at times I tried to do the next series, it has been some time between innings here. Thankfully, salted and rolled hides stored somewhere dark with a bit of airflow will not dry out- you can leave them a fair while before they become "beyond use".
Usually a couple of days salting will suffice to help harden the hair follicles and tighten the skin whilst pickling the flesh membrane, but a couple of weeks does not seem to matter. So now the hides have had a sufficient salted period, it is time to un-roll and strip any flesh membrane remaining after the initial skinning.

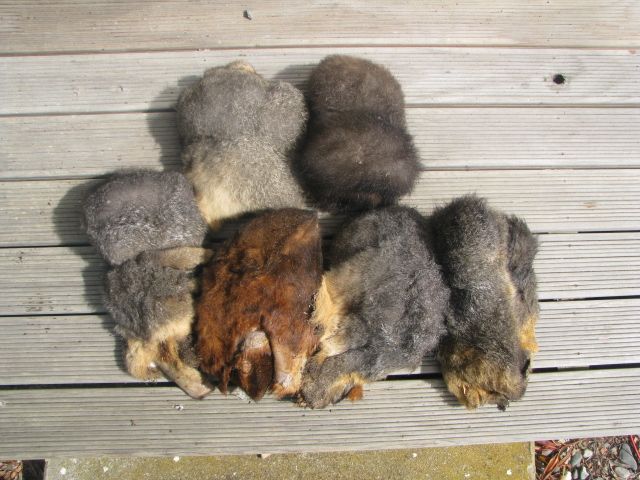
Rolled/salted pelts.

Image

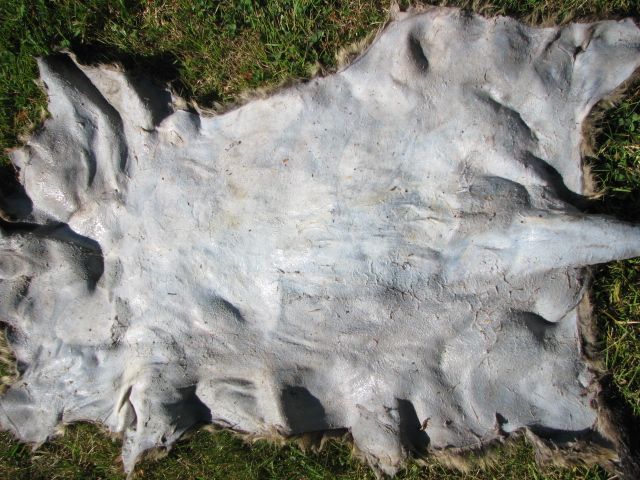
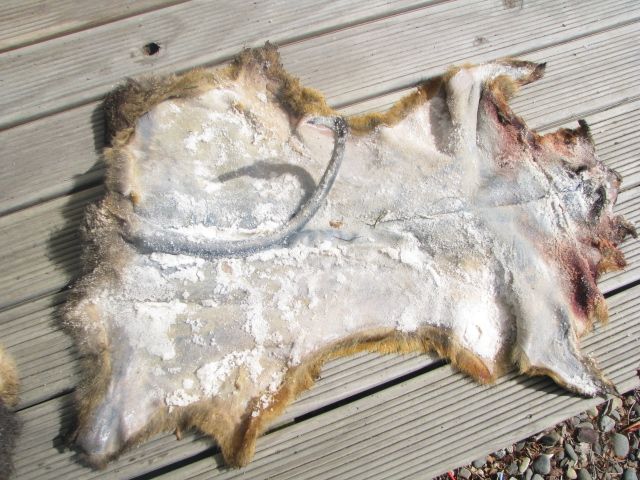
Unrolled and heavily salted.

Image

I prefer to do this outdoors, but no reason it could not be done in a garage with a concrete floor. It just is NOT one of those jobs for the den! :roll: First up, give the skin a vigorous shake to remove most of the loose salt. Then onto the fleshing station.......
I use an old chair that is kind of specific for the task, a length of 4X2" (2X4 for most of you) timber 3' long or thereabouts and an old teaspoon. A dessert or table spoon works just as well, you just want a dull rounded edge.

Image

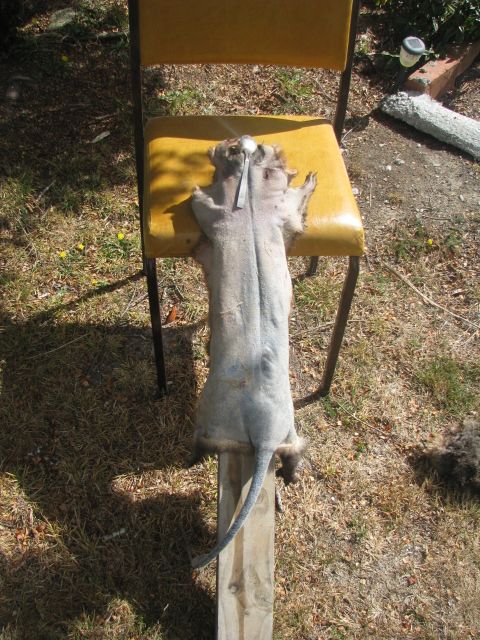
I sit on the chair, timber between my legs and resting on the front edge of the seat. Skin if placed fur side down on the 4X2 and tail down- head up, so you are stripping the flesh from head to tail.
Starting at the head, I use the bowl section of the spoon to scrape the skin. The edge of the spoon not so much cuts through as pushes the flesh aside, kind of rolling it off the skin. Once started it is easy to keep working down the skin pushing, rolling and manipulating the flesh away. Sometimes it will come off in large sections- often though it is in smaller sections.
If it is really difficult to convince the flesh to separate from the skin, re-salt, re-roll and put away for another couple of days.
A wee word of warning here, possum skins are as tough as old boots and you can be quite rough with the fleshing actions. Some small mammalian pelts are quite thin and can tear very easily- just use enough pressure to get the job done, be careful not to run the spoon over the sharp edges of the 4X2 as this can cause tear through. As your dominant hand guides the spoon, your off-hand holds the top of the skin, keeping it taunt.
Work your way to the tail area, often a fatty area that requires a bit of extra effort.

Image

At the bottom of the timber once the hide is fleshed should be a "collection" of salt and heavily salted flesh membranes. The hide should be basically "clean" on the flesh side.

Image

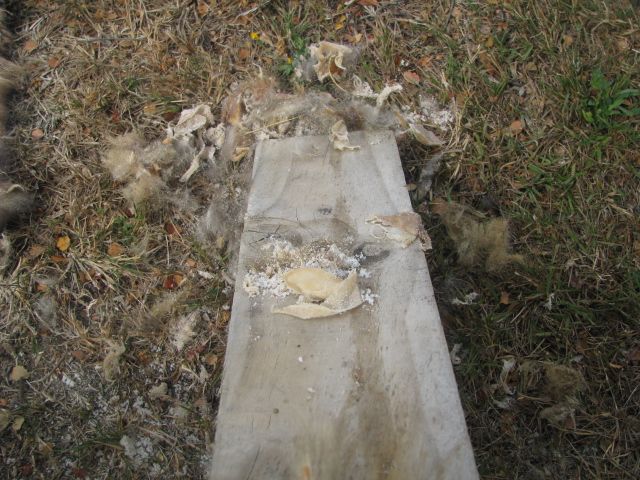
Now, for those of you that keep dogs and they are hanging around salivating whilst you are doing this..... DO NOT let them eat the by-products of your work. Dogs cannot process a lot of heavily salted things and it can do them some very real harm. Clean it up and bin it before Fido shows up or is allowed to investigate the area.
Raw salt and the pressure points of the spoon on your hands/fingers if not used to this kind of thing can be pretty hard on skin, wear gloves if you have any doubt beforehand, better to loose a bit of dexterity with wearing gloves that to suffer from red raw dry skin and blisters. ;)

After fleshing, the hides should be well rinsed off with clean water.

Image

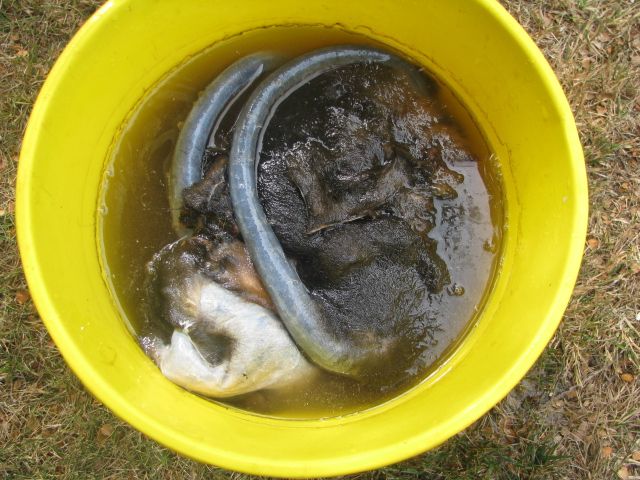
Most store bought chemical tanning kits for small hides only require "slicing" of the flesh section of the hide rather than full removal as the chemicals are absorbed/penetrate from both the hair side and flesh side of the pelt.
However, I feel total or near to it removal is best for Borax treatment and overall end result and tidiness of the finished product.

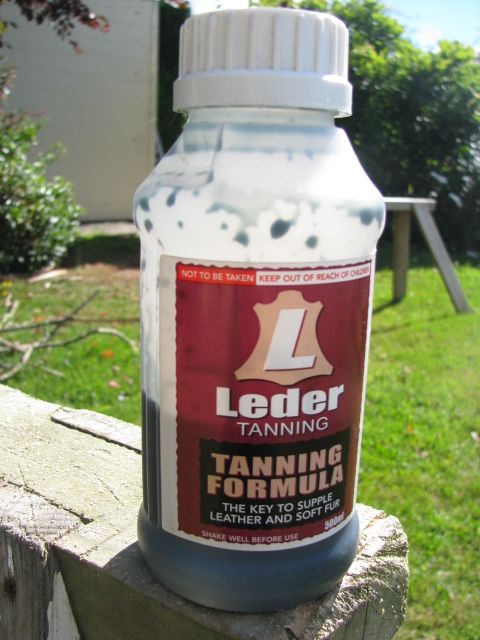
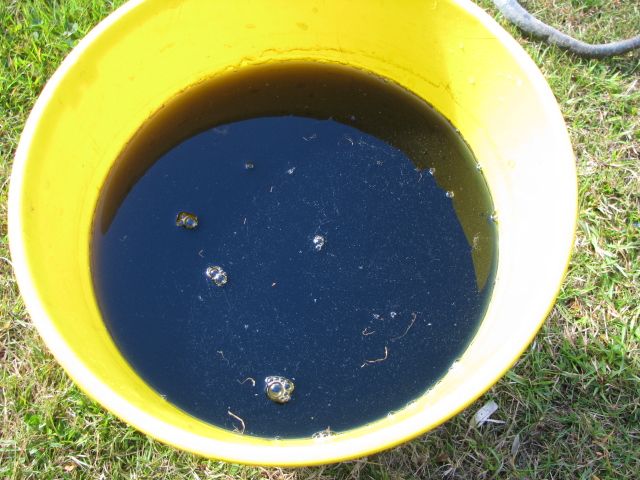
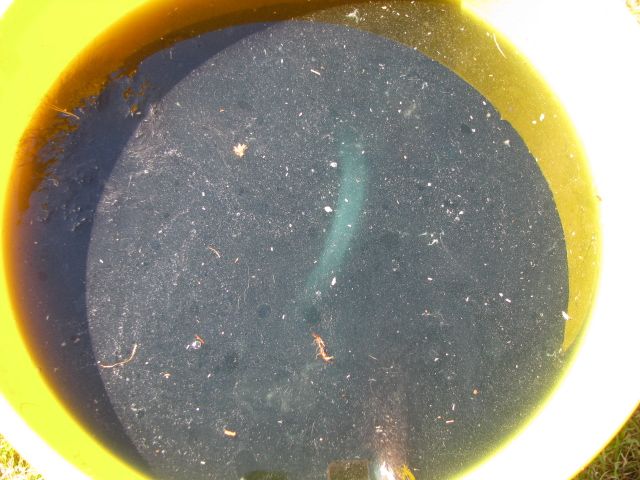
Next up will be the chemical bath and I might do one under Borax just for demonstration purposes.
I will try not to let this slip back to page 3 before I can get to this! :lol:
"Listen to the sound of the river and you will get a trout".... Irish proverb.
User avatar
cassady
Posts: 189
Joined: Sat Jul 28, 2012 10:10 pm

Re: Possum Pelt Processing.

Post by cassady » Mon Mar 10, 2014 7:50 am

Great stuff! Quite the learning experience.
fflutterffly
Posts: 1161
Joined: Sun Jan 24, 2010 12:24 pm
Location: Los Angeles, CA

Re: Possum Pelt Processing.

Post by fflutterffly » Mon Mar 10, 2014 8:18 am

Skinned like a rabbit.
"Every day a Victory, Every year a Triumph" Dan Levin (My Father)
User avatar
hankaye
Posts: 6582
Joined: Tue Jun 08, 2010 4:59 pm
Location: Arrey, N.M. aka 32°52'37.63"N, 107°18'54.18"W

Re: Possum Pelt Processing.

Post by hankaye » Mon Mar 10, 2014 9:27 am

Mataura mayfly, Howdy;

Excellent! Have you thought about a round log so you don't
chance the "be careful not to run the spoon over the sharp
edges of the 4X2 as this can cause tear through.
"
Interesting side note, should you decide to attempt to do one
with the brain tanning method,
http://survival.outdoorlife.com/blogs/s ... ning-hides
every critter contains enough brain
material to tan it's own hide. Picked that nugget of information up
from a "Mountain Man" re-enactor that was doing a demonstration at a
rendezvous in the town I used to live in while in Utah.

hank
Striving for a less complicated life since 1949...
"Every day I beat my own previous record for number
of consecutive days I've stayed alive." George Carlin
User avatar
letumgo
Site Admin
Posts: 13345
Joined: Sat Feb 21, 2009 7:55 pm
Location: Buffalo, New York
Contact:

Re: Possum Pelt Processing.

Post by letumgo » Mon Mar 10, 2014 11:47 am

Jeff - I should have known better than to read this post, while I was eating my lunch. Suddenly my sandwich did not taste so good, when I got to the last photo (yellow bucket shot). :lol:

All kidding aside, what a great post. These step-by-step processing tutorials are fascinating. I find this sort of thing to be very helpful. I have not seen these sorts of posts on other fly tying sites. Thank you for the time and effort in stepping us thru your tanning process.
Ray (letumgo)----<°))))))><
http://www.flytyingforum.com/index.php? ... er=letumgo

"The world is perfect. Appreciate the details." - Dean
Mataura mayfly
Posts: 3648
Joined: Thu Oct 27, 2011 6:28 am
Location: Southland, South Island, New Zealand.

Re: Possum Pelt Processing.

Post by Mataura mayfly » Mon Mar 10, 2014 2:28 pm

Hank, yes I have. If dealing with larger pelts (full Deer or Sheep skins) I use a half round fence post with a wooden stand made up as a "proper" fleshing beam.
You could use most any solid base you find easiest, even a bench top. I use 4X2" timber for small stuff as the chair is comfortable height to sit at and use the shorter timber support outdoors and being a carpenter I have lots of 4X2 off cuts laying about. ;)
Interesting you mention the brain matter tanning. One of our other members here who is pretty "in touch" with the land and sustainable living (despite living in an urban environment) uses this method a lot. Perhaps he will do a similar post one day when he has a fresh Pecan nut thief to process.

Ray, you should know by now that most of my posts in the "cabin" are not suitable for mealtime viewing! :lol:
Not sure I have either, on fly-tying forums at least. Then again, we are a versatile and somewhat diverse group here that rather than shun the outside World and different ideas/views we tend to embrace and learn from such things.
"Listen to the sound of the river and you will get a trout".... Irish proverb.
Mataura mayfly
Posts: 3648
Joined: Thu Oct 27, 2011 6:28 am
Location: Southland, South Island, New Zealand.

Re: Possum Pelt Processing.

Post by Mataura mayfly » Mon Mar 10, 2014 6:19 pm

Next up, preparation and adding the hides to the tanning pickle.
This is the chemical tanning solution I use. Easy to use, readily available and works well.
The product is made in Australia and used to be known by a slightly different name.

Image

Now, we are not playing Tiddlywinks here kids! This is serious stuff, note the warnings on the bottle and the childproof cap, if you are going down this path yourselves, have specific tools and equipment for this stuff and for this stuff only. Do not use metal containers as tanning baths, the chemicals react with the metal and cause horrific corrosion that can eat through thin tin before tanning of your hides is complete. The minerals in the metal container will also "change" the composition of the chemical bath, so you may end up with ruined hides- or some kind of very toxic waste mixture. USE PLASTIC measuring cups and as a tub for the bath.
Read the instructions- pay attention to the safety warnings- use the protective gear advised. This stuff might contain carcinogen elements- might not harm you immediately- but down the track? Also it is designed to be absorbed and penetrate skin....... so pay attention folks and play safe.

OK, enough of the OSH speech. This particular product calls for the entire 500ml to be added to 50 litres of clean water plus 2 KG of table salt added to the mix. This is too much for what we are doing and more suited to maybe one or two full deer hides. I do a lot of small batch tanning, because if you leave hides in the solution for a long time (forget about them) they will continue to use the active ingredients in the bath until all are consumed. If you added one possum skin to a 50 litre bath it will continue to absorb all the "salts" until you end up with "clear" water again. You will have one VERY well preserved hide, but you will have wasted a lot of solution.
I just do the basic math to make lesser quantities, usually around 8 litres at a time, sufficient for three possum pelts.

Again, follow the instructions that come with the kit and mix outdoors. Use a stick that can be discarded as a mixing tool, you do not want to play "fetch" with Fido with this stick afterwards.
With the product I use, you get a very dark blue (almost black) solution.

Image

Then it is a case of wringing out the skins that have been rinsed in clean water and adding them to the mix. Use your stirrer to agitate and plunge the skins into the bath, you want to try to remove as much air as possible as air pockets will prevent the solution entering the hide.

Image

Sometimes no matter what you do the hides will pop to the surface and create air pockets. Place a clean large stone or brick on top of the hides to keep them submerged.
Then place the container in a safe spot where it cannot be knocked over, out of direct sunlight and let it alone for a while.
This product takes from 3 to 10 days to do its thing, others may vary. I like to inspect each day, remove and wring the hides and check condition.
You are aiming for total and uniform colouration change of the entire skin side. Any missed membrane that was not removed when fleshing will show up as a raised area of different colour- usually lighter. This can be removed and the hide placed back in the bath. Lighter areas that are not visibly raised will be from trapped air pockets, this "checking & wringing" helps eliminate air and redistribute the untanned areas in the bath when you place the hides back in the bath.

This pelt was removed from a weak solution and if you look close you can see the areas of light untanned skin versus the "blue/green" tones of the tanned sections.

Image
"Listen to the sound of the river and you will get a trout".... Irish proverb.
Post Reply