Framing Flies - DIY Craft Project
Posted: Sun Feb 15, 2015 1:02 pm
My daughter gave me a set of 5"x7" picture frames for Christmas, and I am just getting around to playing around with them. I've wanted to try my hand at framing of flies. I decided to start with a set of three beautiful flies that Carl sent to me last year. The flies were part of his "Fade Series" flies, he had shown on the forum. The flies are beautiful (a detail lost in this series of photos).
Here are the items used for my framing project:
5"x7" picture frames
Heavy duty water color paper (it has a great bulky texture which I think enhances the look of the framed flies).
Fiskars paper cutter (stolen from my wife...shhhh...this thing has been great for making swap labels too...)
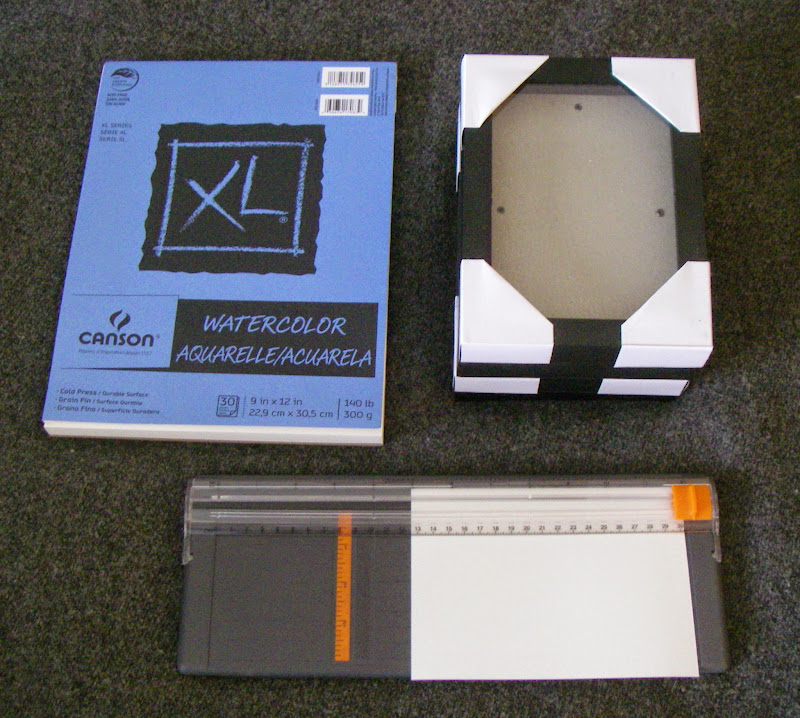
Sharp needle, spool of Ultra Wire (size "Small"), finger nail clippers for cutting the wire, masking tape for securing the wire in place.

Start by cutting a piece of water color paper to match the size of the rear panel of the frame.

Next cut out a smaller section and plan out where the flies will appear on the paper.
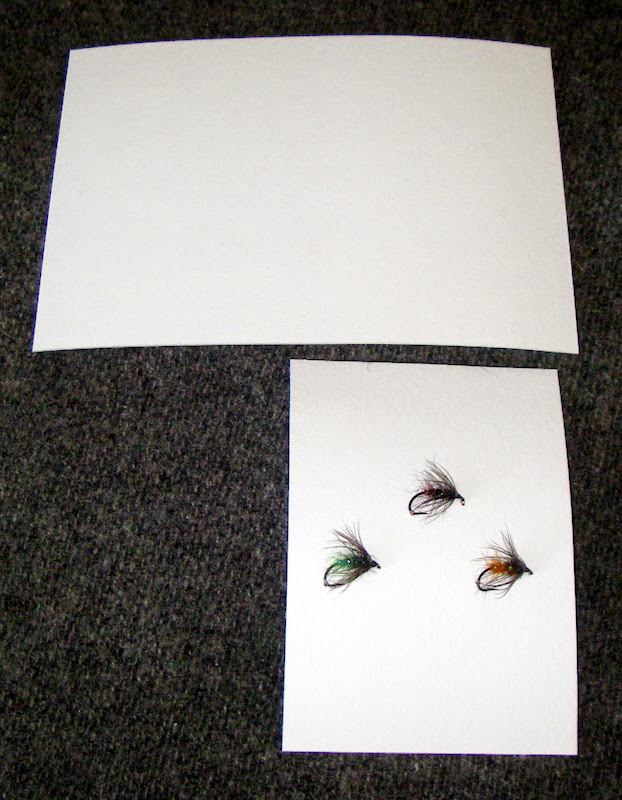
I wanted the flies to be raised off the back of the frame, in a gentle curve. This meant that I needed to cut the paper a little wider than the inside of the frame. This is definitely a bit of trial-and error part of the project. I started with a piece of paper that I knew would be too tall, and then trimmed small sections of it off, placing it into the frame to check the appearance, and repeating process until I was happy with the final curve.

The flies are mounted to the paper with copper wire. The wire is inserted thru holes in the paper, bent outwards and taped into place. I used one wire thru the eye of the hook, and a second wire around the bend of the hook. The wires will hold the hooks securely in position, without obscuring or distracting from the beauty of the flies.

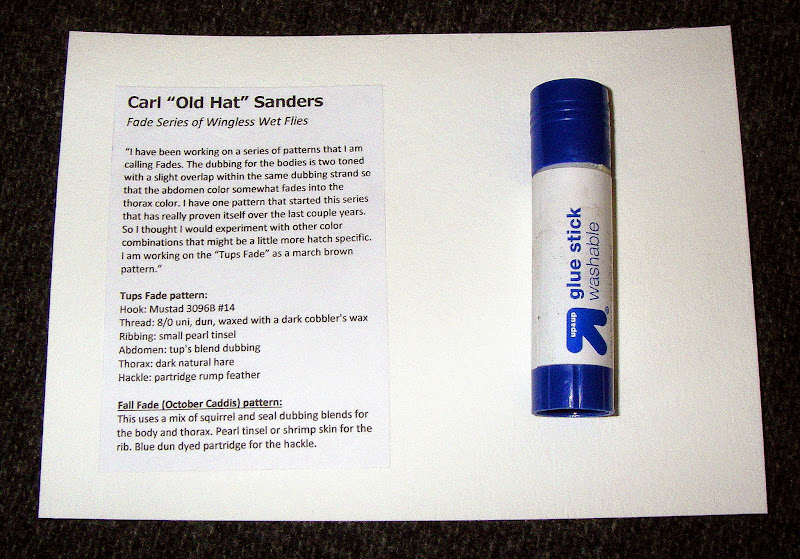
I then created a small text box, crediting the flies to Carl "Old Hat" Sanders, and capturing the recipe of the flies.
Components ready for framing.
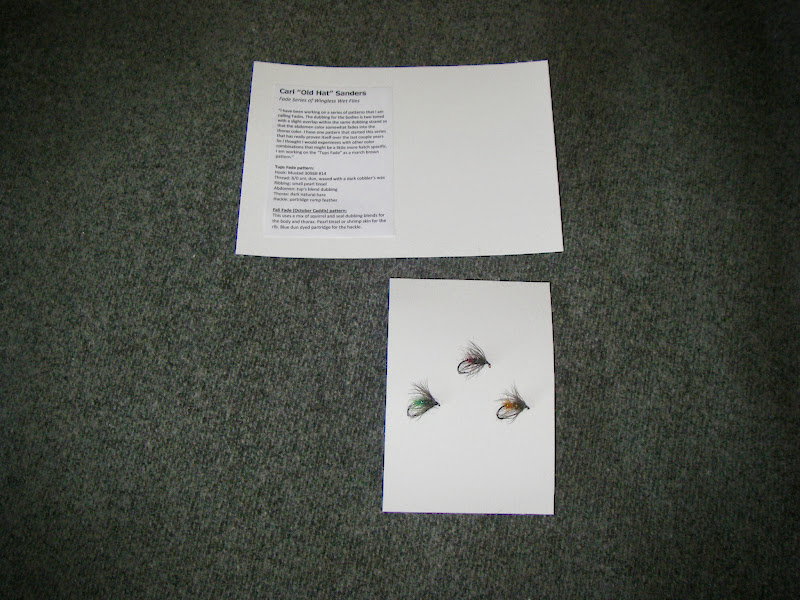
It is important to clean the inside and outside of the frame with window cleaner, before putting the pieces back together.

The curved mount for the flies creates a pleasant effect, when seen in proper lighting. It creates a soft curved shadow, adding depth to the display.

(this photo does not do it justice. I was trying to photograph the frame in bright sunlight to capture the rich color of the seal fur in the fly bodies, but the lighting is too harsh. The color is lost due to the high contrast).
Well, that was my grade school project for today. It was fun to play with a glue stick again, but it doesn't taste as good as the glue we had in kindergarten.

Here are the items used for my framing project:
5"x7" picture frames
Heavy duty water color paper (it has a great bulky texture which I think enhances the look of the framed flies).
Fiskars paper cutter (stolen from my wife...shhhh...this thing has been great for making swap labels too...)
Sharp needle, spool of Ultra Wire (size "Small"), finger nail clippers for cutting the wire, masking tape for securing the wire in place.
Start by cutting a piece of water color paper to match the size of the rear panel of the frame.
Next cut out a smaller section and plan out where the flies will appear on the paper.
I wanted the flies to be raised off the back of the frame, in a gentle curve. This meant that I needed to cut the paper a little wider than the inside of the frame. This is definitely a bit of trial-and error part of the project. I started with a piece of paper that I knew would be too tall, and then trimmed small sections of it off, placing it into the frame to check the appearance, and repeating process until I was happy with the final curve.
The flies are mounted to the paper with copper wire. The wire is inserted thru holes in the paper, bent outwards and taped into place. I used one wire thru the eye of the hook, and a second wire around the bend of the hook. The wires will hold the hooks securely in position, without obscuring or distracting from the beauty of the flies.
I then created a small text box, crediting the flies to Carl "Old Hat" Sanders, and capturing the recipe of the flies.
Components ready for framing.
It is important to clean the inside and outside of the frame with window cleaner, before putting the pieces back together.
The curved mount for the flies creates a pleasant effect, when seen in proper lighting. It creates a soft curved shadow, adding depth to the display.
(this photo does not do it justice. I was trying to photograph the frame in bright sunlight to capture the rich color of the seal fur in the fly bodies, but the lighting is too harsh. The color is lost due to the high contrast).
Well, that was my grade school project for today. It was fun to play with a glue stick again, but it doesn't taste as good as the glue we had in kindergarten.


