Post
by letumgo » Sun Oct 15, 2017 9:34 am
Bill - Thank you for posting these photos of Dana's quill body flies. Carl and I had the pleasure of watching Dana tye a quill body fly, while we were in Roscoe. In hindsight, I should have been recording the tying session, for sharing purposes, but I was too engaged in the demonstration to think of it at the time. It is a fascinating process.
Here are a few of the tips that I picked up during the demonstation:
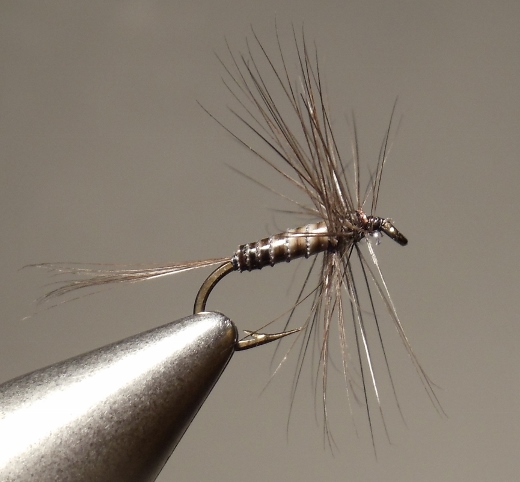
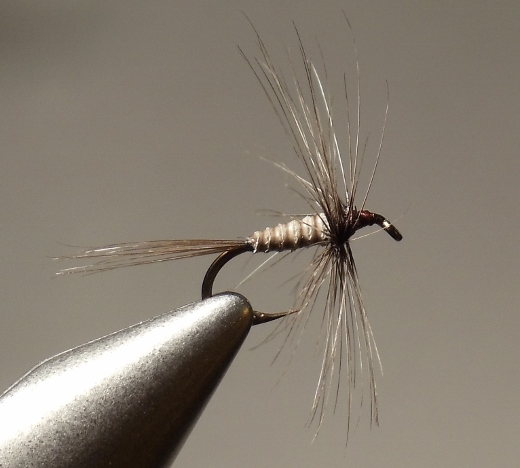
* The process begins by selecting the proper quill, paying special attention to the colors in the hackle stem. It is best to pick a hackle stem with two or three separate colors in the main stem.
* The hackle is then prepared by carefully trimming off the fluffy hackle fibers along the base of the feather. The fibers are cut close along both edges, but you can still see the stubble along the edge it you look carefully at the quill. This seems to add a bit of extra texture which almost suggests fine gills along the ends of the quill body.
* After the hackle stem is trimmed, it is then dropped into a cup of warm water for soaking
* While the quill soaked, Dana began tying the fly. He was very meticulous with the underbody of the fly. The tail fibers were tyed in the full lengtht of the quill body, then a gentle taper was formed with the tying thread. The thread wraps were very close and even, forming a nice foundation for the quill overbody.
* The soaked/softened quill is then flattened with pliers. The jaws of the pliers are smooth and roughly 1/4" wide. The hackle quill is held at a 90 degree angle to the centerline of the jaws of the pliers. Firm pressure is clamped on the hackle stem, to flatten the stem. It is easy to apply too much pressure and over crush the hackle stem. One needs to develop a feel for how much pressure one can apply, without damaging the hackle steam.
* Dana leaves a small step at the back of the thread underbody, near the base of the tail. This helps the first wrap of hackle fiber to sit properly on the back of the fly. A small detail, which comes with experience.
* The hackle stem is tyed in by the tip end (narrow end), along the shank of the hook. I believe that the hackle quill was tyed in along the bottom side of the hook (sorry I can't remember for sure - perhaps Dana will chime in and correct any errors I've made).
* The quill body is surprisingly durable. If one is concerned about durability, one could always brush a thin coat of super glue onto the thread underbody, before wrapping the quill.
* When the fly was finished, Dana then attached each finished fly to a short section of leader (roughly 6"long). The leader is tyed onto the fly with a UNI knot (fly end) and an open loop perfection knot at the other end. The fly is stored this way in his fly box. The fly is ready to quickly attach to the tippet with a loop connection.
* Dana also showed us how to prepare leaders with a "endless loop knot", which allows the flies to hang perpendicular to the fly line (prevents tangles).
Overall, I was very impressed by the demonstration, and plan to try my hand at quill bodies myself in the future. I will also make use of the loop connections more in the future, in my fishing preparation. I can see that Dana has put a great deal of time into preparations at the bench, so the when he is on the stream, he can spend most of his time fishing instead of puttering around with knots. He just slips one fly off his line and attaches another prepared fly on. Zip. Zip. Fishing!
Dana also showed us a very large, two-sided fly box containing flies by Ivan. I wish I had taken close up photos of the fly box, because the flies are amazing!
Anyway, it is nice to see the tricks and tips of a true wet fly fisherman. Bravo Dana. You are a good teacher.