Bill's Stonefly Flymph Tutorial (SBS Photos)
Posted: Mon Apr 01, 2013 8:31 pm
Bill asked me to help him post a series of photos that he took, showing his Stonefly Flymph pattern. The tying sequence, photos and pattern are all Bill's doing. I am simply helping post the photos in the order of the tying sequence.
The materials and recipe are as follows, along with a few comments on their application:
Bill Shuck's Stonefly Flymph
Hook: Daiichi 1260, Size #14
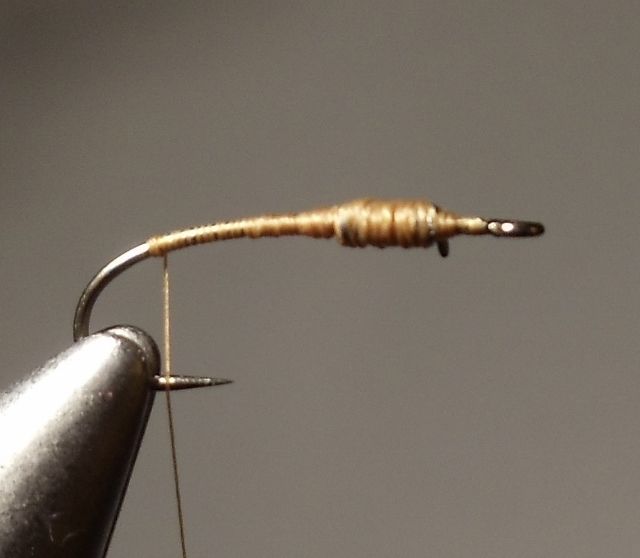
Thread: Sheer 14/0, amber
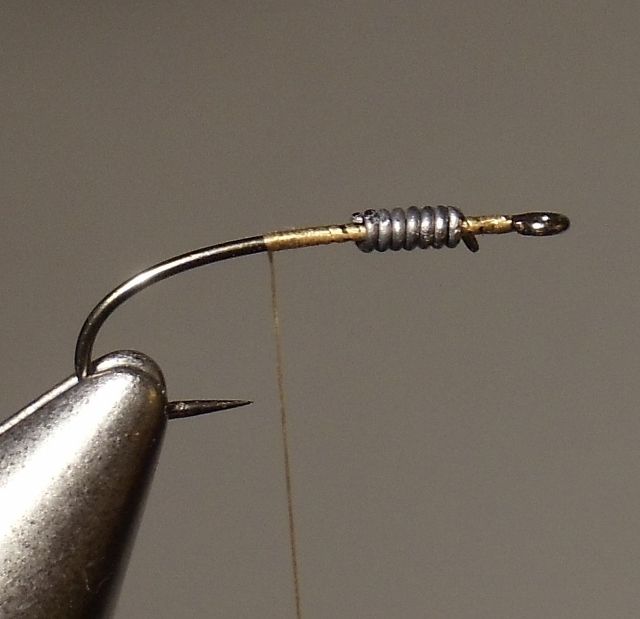
Weight: 5-7 wraps of .015" wire (lead-free if available)
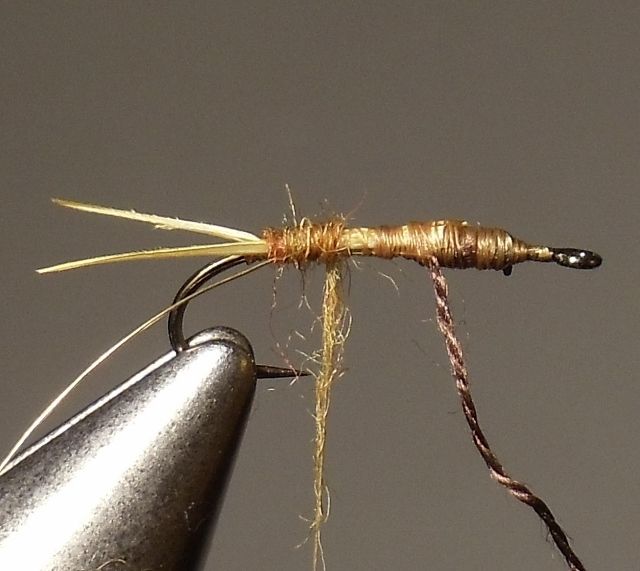
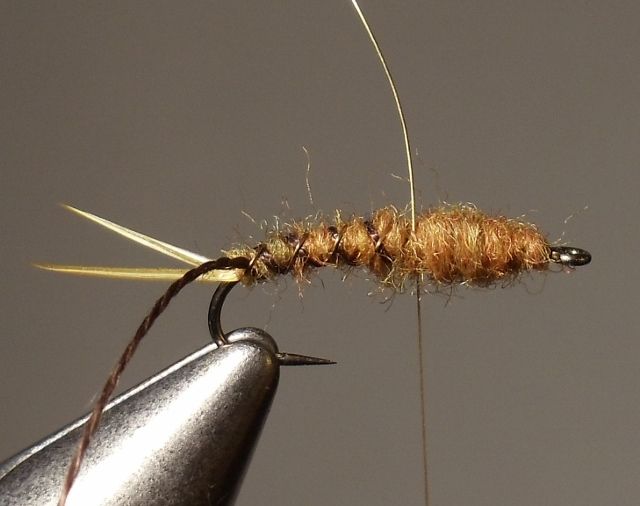
Tail: Turkey biots, dyed sulphur orange
Ribbing: Antiqued gold wire (at rear) and single strand of brown embroidery floss (thorax)
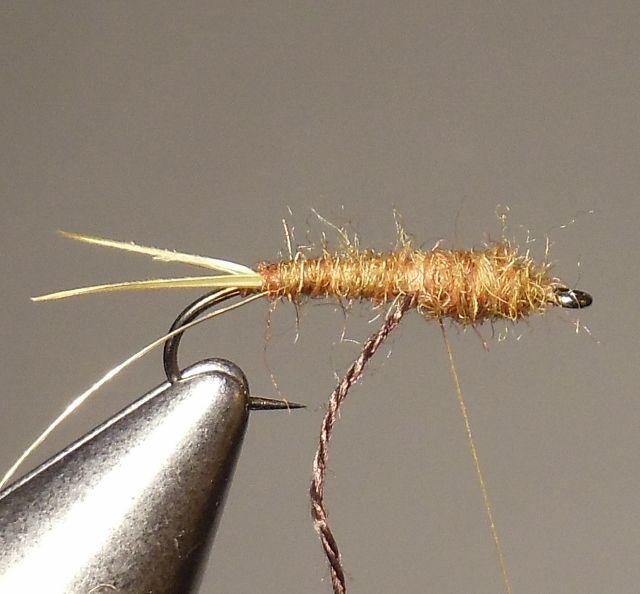
Dubbing: Blend of wool yarn fibers, very sparsely twist dubbed onto tying thread. Dub from tail to eye and back to rear of thorax. Twist brown thread strand tight and palmer back to tail; trap thread with first forward wrap of wire rib and then continue palmering wire up to thorax and tie off. Remove excess ribbing.
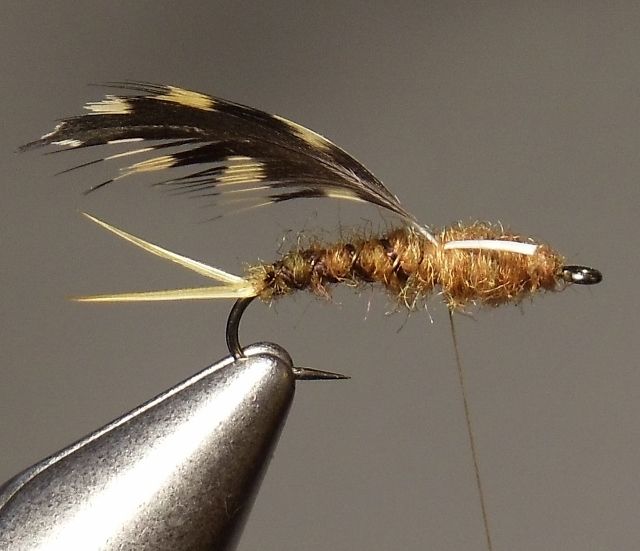
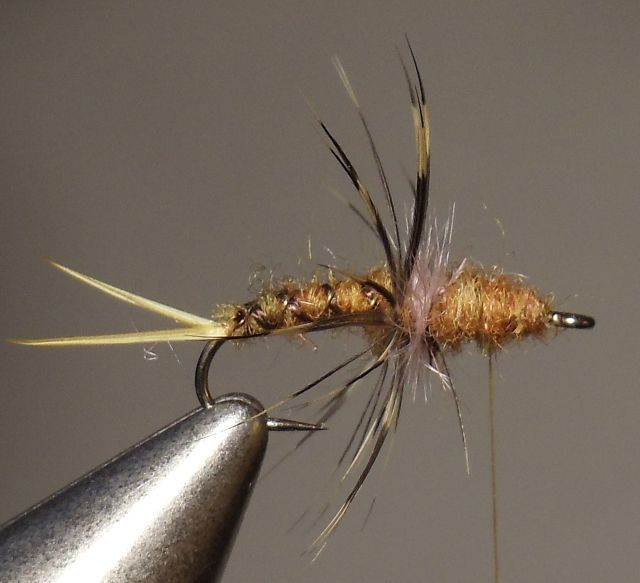
Hackles: Tie in single Golden plover feather at rear of thorax, make one wrap and tie off. Then tie in single strand of grey ostrich herl directly in front of feather hackle, make one wrap and tie off. Spiral thread forward and repeat hackling process at front of thorax area.
Head: Build slightly tapered head using thread wraps, whip finish, and add a drop of head cement if you are so inclined.
Photos of the tying sequence:
Ribbing: Antiqued gold wire (at rear) and single strand of brown embroidery floss (thorax)

Dubbing: Blend of wool yarn fibers, very sparsely twist dubbed onto tying thread. Dub from tail to eye and back to rear of thorax. Twist brown thread strand tight and palmer back to tail; trap thread with first forward wrap of wire rib and then continue palmering wire up to thorax and tie off. Remove excess ribbing.
Hackles: Tie in single Golden plover feather at rear of thorax, make one wrap and tie off. Then tie in single strand of grey ostrich herl directly in front of feather hackle, make one wrap and tie off. Spiral thread forward and repeat hackling process at front of thorax area.

Head: Build slightly tapered head using thread wraps, whip finish, and add a drop of head cement if you are so inclined.

Bill - Beautifully done...
The materials and recipe are as follows, along with a few comments on their application:
Bill Shuck's Stonefly Flymph
Hook: Daiichi 1260, Size #14
Thread: Sheer 14/0, amber
Weight: 5-7 wraps of .015" wire (lead-free if available)
Tail: Turkey biots, dyed sulphur orange
Ribbing: Antiqued gold wire (at rear) and single strand of brown embroidery floss (thorax)
Dubbing: Blend of wool yarn fibers, very sparsely twist dubbed onto tying thread. Dub from tail to eye and back to rear of thorax. Twist brown thread strand tight and palmer back to tail; trap thread with first forward wrap of wire rib and then continue palmering wire up to thorax and tie off. Remove excess ribbing.
Hackles: Tie in single Golden plover feather at rear of thorax, make one wrap and tie off. Then tie in single strand of grey ostrich herl directly in front of feather hackle, make one wrap and tie off. Spiral thread forward and repeat hackling process at front of thorax area.
Head: Build slightly tapered head using thread wraps, whip finish, and add a drop of head cement if you are so inclined.
Photos of the tying sequence:
Ribbing: Antiqued gold wire (at rear) and single strand of brown embroidery floss (thorax)
Dubbing: Blend of wool yarn fibers, very sparsely twist dubbed onto tying thread. Dub from tail to eye and back to rear of thorax. Twist brown thread strand tight and palmer back to tail; trap thread with first forward wrap of wire rib and then continue palmering wire up to thorax and tie off. Remove excess ribbing.
Hackles: Tie in single Golden plover feather at rear of thorax, make one wrap and tie off. Then tie in single strand of grey ostrich herl directly in front of feather hackle, make one wrap and tie off. Spiral thread forward and repeat hackling process at front of thorax area.
Head: Build slightly tapered head using thread wraps, whip finish, and add a drop of head cement if you are so inclined.
Bill - Beautifully done...