Page 1 of 5
Tying Station Design...Layout
Posted: Thu Nov 18, 2010 1:35 pm
by William Anderson
I would love to see everyone's tying area's/stations/desks. I'll post mine to start this off.
DD asked for additional shots of my tying station...which I feel is a bit self indulgent posting...but I'll do it for a friend.

I am proud of the current station...after lots of transformations and testing. I'm a designer and the ergonomics and efficiency/joy of my station is important. So...
This station has changed a lot. I drill holes and then plug them to move stuff around. I glue on corks and magnets, tear them off and rearrange them if I find a better sequence of movements...or a new tool. So here it is. You can see all the sticks in the upper deck move with each session. I have to store all my stuff away in an armoire and put it on the coffee table to tie, so it can take a second to set up. That's a large factor in the design. I need to have as many materials on the station (out of all the plastic bins that are organized in the armoire) so I only have to bring it out...and not have to go back. Tools are added and rearranged, but have a very very specific home. I sometimes hook completed flies in the tops of the corks on stick in the upper deck, and sometimes on little magnets glued to little pins that stick in the cork on the base level.
The materials are actually a laminate of 2" thick solid hardwoods, planed smooth. The upper deck is a piece of cherry, suspended by two steel bars on the back.
I've tried some fancy designs and some that are clever...but this straight forward design works better for me.
William - tying station reduced 01a.jpg
William - tying station reduced 01b.jpg
Re: Tying Station Design...Layout
Posted: Thu Nov 18, 2010 1:44 pm
by Johnno
nice William
Re: Tying Station Design...Layout
Posted: Thu Nov 18, 2010 1:47 pm
by William Anderson
The black thing on the base is a piece of hark cork with black velvet glued to it. It is not attached (for clean up) but sits just below the vise. It catches trimmings, and makes small fibers very easy to handle. I'm right handed and use very fine tweezers to sort and pick up most all materials, fibers, dubbing, etc. It is also a fantastic background for contrast to all the materials that go into a fly. There's no glare with it being deep black velvet. It has an area of the same cork to hold tools...not currently in use.
The main tools are in the large corks (from the bottoms of champagne corks). Hackle pliers are picked up and put down standing on the magnets in the front row, so you dont have to pick them up, just slip you finger in them and they never "travel around". Hooks are all dropped, in the correct number needed plus a couple on the magnets between the tweezers and the vise.
William - tying station reduced 02.jpg
William - tying station reduced 03.jpg
William - tying station reduced 05.jpg
Pre-emptive answers to upcomming questions: the materials on the velvet are the two shades of porcupine guard hairs and two shades of cdl tailing for a couple of swap flies last year. the Pork and Hen Light and Pork and Hen Dark.
Re: Tying Station Design...Layout
Posted: Thu Nov 18, 2010 1:54 pm
by William Anderson
The other thing that I have found extremely helpful are the three boxes. One tall one holds a ton of quills/feathers, so I almost never have to go digging in cases to find a pheasant tail or turkey tail feather or peacock spear. They are trimmed to fit the armoire as are the sticks on the upper deck. The upper box holds misc things...in transition, and the lower box is waste. I pick up every peice between flies so it stays functional. With this kind of small operation, I cant have anything moving around or out of place, and certainly not littered. I'm a dork on several fronts...and this is no exception.
William - tying station reduced 06.jpg
Thanks for letting me share this. Please post your own. I would be curious to see how everyone manages all the tools and materials.
w
Re: Tying Station Design...Layout
Posted: Thu Nov 18, 2010 2:37 pm
by chase creek
Thanks for posting; interesting use of space. Always enjoy seeing others tying stations. A good source of ideas.
Remember, "to steal ideas from one person is plagerism. To steal from many is research."
I've long used magnets at the bench for various things, and also have 5"x5" piece of magnetic sheet under my vise.
I also like those little clips with wax (or something like it) on the back that can be attached to the front of shelves for holding everything from packages of hooks to newspaper clippings. They can be removed and relocated with no damage.
Re: Tying Station Design...Layout
Posted: Thu Nov 18, 2010 4:38 pm
by Ron Eagle Elk
I don't have a tying station, just a desk. We have a room that used to be our dining room that is used as our tying area. My lovely wife said we needed a tying area more than we needed a dining room.
Here's my part of it.

This is VEE's part of it.
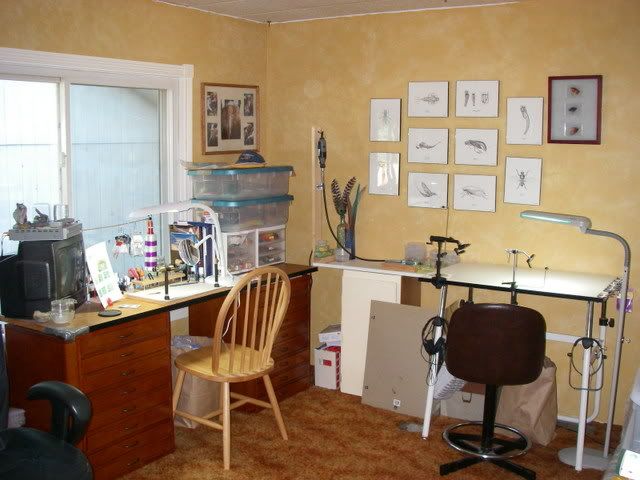
REE
Re: Tying Station Design...Layout
Posted: Thu Nov 18, 2010 4:59 pm
by daringduffer
Thank you, William. Sparse and neat - just like your flies. Well thought out and well made. No surprise there.
dd
Re: Tying Station Design...Layout
Posted: Thu Nov 18, 2010 6:44 pm
by letumgo
Here is my new tying desk. My materials are now within an easy reach. I am loving my new tying area.
2010_1118_192430AA.JPG
2010_1118_192409AA.JPG
Re: Tying Station Design...Layout
Posted: Fri Nov 19, 2010 2:20 am
by Johnno
you guys have one big problem... its all far too neat!
I won't show you a pic of mine after a few hours of hard core tyin': Looks like a chicken, a rabbit, a possum, a few game birds and a deer all hit the table at full speed from 2000 feet. It does get cleaned up eventually but still. Always a dead coffee cup sitting somewhere, a beer bottle or empty whiskey glass, a reel here, a fly box there......
Don't know why but I have been relegated to the garage

Re: Tying Station Design...Layout
Posted: Fri Nov 19, 2010 2:34 am
by kanutripr
I'm not showing you mine 'cause then you'll know why I can't find my scissors half the time

Vicki